The Pre-Heater
Stage V
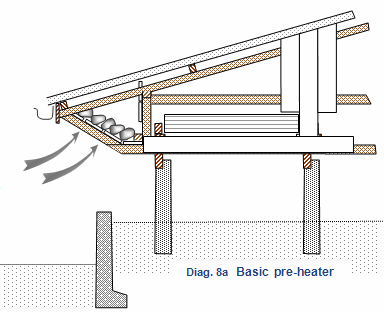
 Diagram 8a (left) shows a pre-heater with a timber-slated floor covered with large stones.
Air comes in under the gutter-facia as well as through gaps between the floor-boards. It is forced over/through the heated stones on its way down under the first baffle.
An alternative to stones would be to line the pre-heater floor with corrugated or sheet iron, preferably painted black on its inside, and white the outside.
Other recommendations:
1. Adjust the combined width of the gaps letting air into the pre-heater to about 200mm.
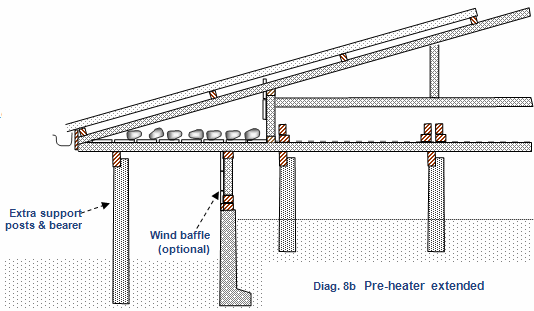
2. A baffle fitted under the pre-heater section (e.g. above the concrete wall) will help to direct rising hot air into the front of the air intake, in preference to taking cooler air from under building.
- Small, removeable wooden shutters should be fitted into the exterior walls of the pre-heater section. These can be opened in the heat of the day to improve the air-flow.
- False fronts are fitted to the trays, large enough to seal the wall openings when they are shut.
Extended pre-heater: If there is sufficient length of roofing material then the design can be adjusted so that the floor joists extend onto another bearer within the pre-heater area (see below).

The larger pre-heater will allow increased heating of the intake air flow. This will be an advantage for sites where fine weather is not as reliable, and during the cooler months, April to August, when the sun is lower.
The extent of advantage to be expected from this is not known, and must be considered in relation to the added cost and construction effort.