Kerry's Aquarium Background
Hi welcome to my site describing the construction of the background in my 3' aquarium.
My aim was to try and achieve a natural looking 3D background, with terraces for plants. I also wanted to be able to hide all of the hardware in my tank, and to make it look like the gravel in the bottom of my tank, had fallen naturally from the wall that I had constructed.
After reading on the net about two other peoples success using polystyrene backgrounds I decided this was the way to go, as opposed to building the wall from rocks, which would have worked out far to heavy.
Below is a step by step description of how I acheived this, it will be a slow loader for some as this is very image intensive.
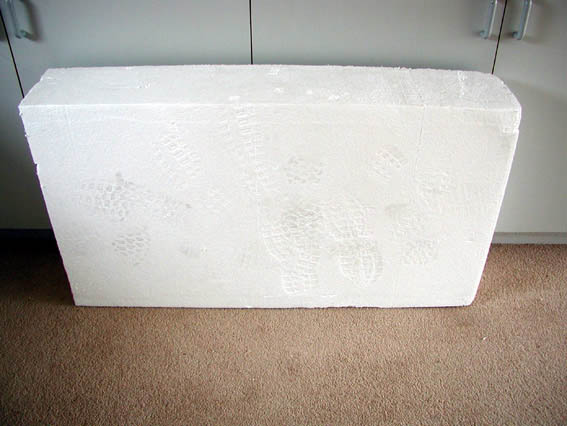
The first step was to obtain a large block of ordinary packing and insulating polystyrene, larger than the tank, and some glue that wouldn't react with it (Expol). This block is about 1100 x 600 x 200mm. I got a piece this large because the lefthand end of my tank is up against a wall, and I wanted to wrap the background around the left side of the tank to hide the wall.

Next was some trimming with an ordinary handsaw, to the tank diamensions, ready for glueing together.

After gluing together out came the hotwire (a modified pokerwork machine) it soon became obvious that I had bought too thicker piece of polystyrene to start with.
I certainly had plenty to play and experiment with. I think if you just wanted a wall along the back of the tank a block 100mm thick would do the job.
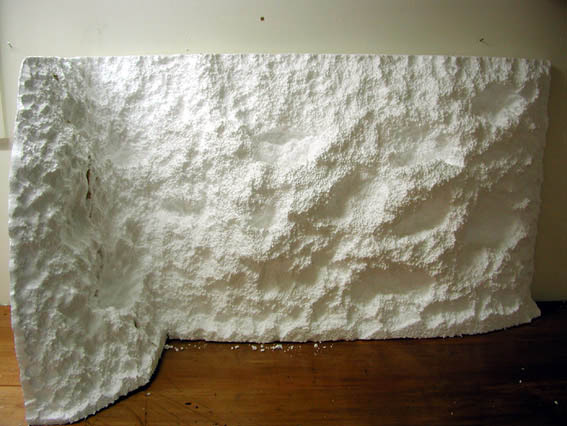
Eventually I found the hotwire a waste of time, and a nice natural look could be acheived by just ripping out hunks of the polystyrene with my bare hands.
This was then finished off with a small blowtorch, carefully moving over the whole surface in a small circular motion, melting together all of the small bubbles that polystyrene is made up off.
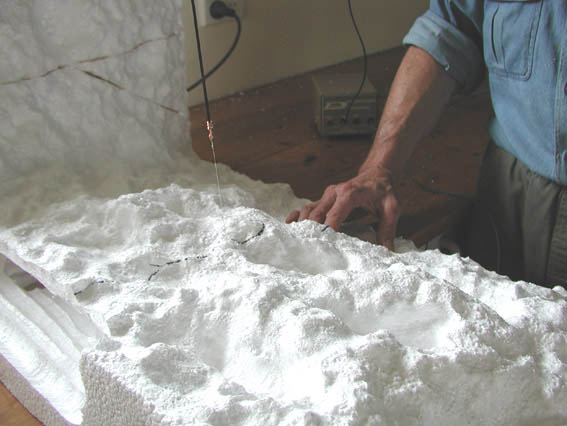
I then had to rig up a hotwire to cut the wall in half, in order to fit it through the opening in the top of the tank. I cut an irregular line down the wall to help in disguising the joint later, I also made the cut on a slight angle so the righthand side of the wall would push in past the left side when it was fitted into the tank. In this picture you can see a cave carved out in the bottom of the wall to house the heater, also visible is the bottom of the chanel to house the outlet to the filter. This will then make the water flow continuously over the heater.
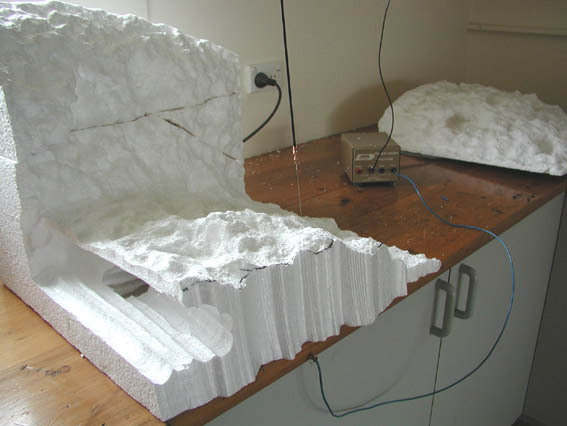
Another look at how the cut was done
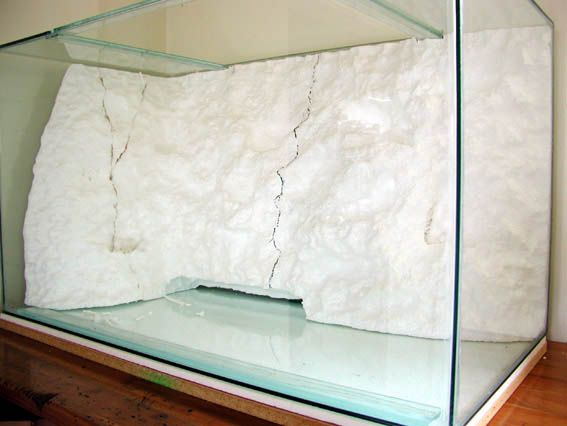
In the tank at last. I couldn't bring the left side of the wall all the way to the front of the tank as I could not have fitted it through the top of the tank, so I gave it a gentle slope back towards the top just to make it more natural.
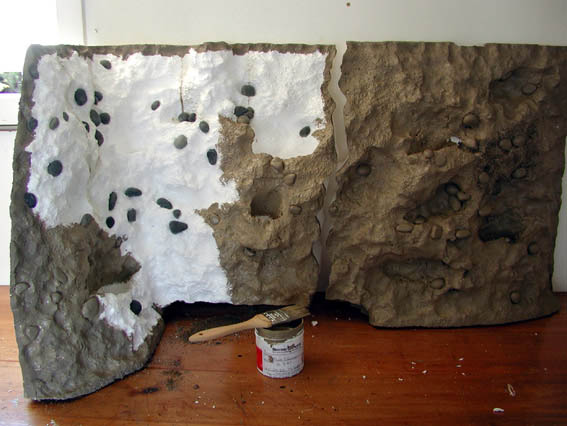
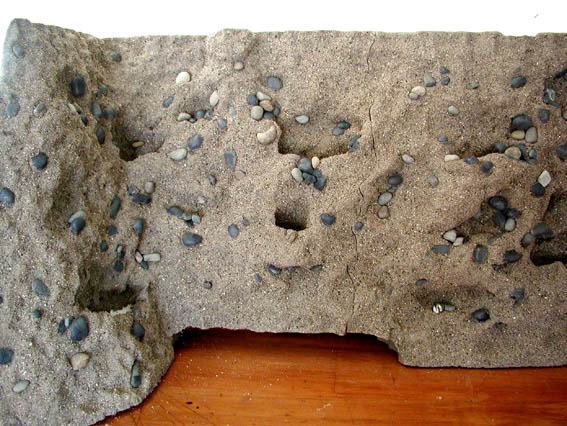
Next some of the larger pieces of the gravel, that I intended using for the base of the tank, glued on with hotmelt glue (I later learnt that any stones could be applied easy enough when the wall was finished, with silicone) followed by a base coat of acrylic paint.
A second coat of paint was applied to make sure no white polystyrene showed through, and while this was wet, I covered it in coarse sand patted into the paint and left to dry for several hours.
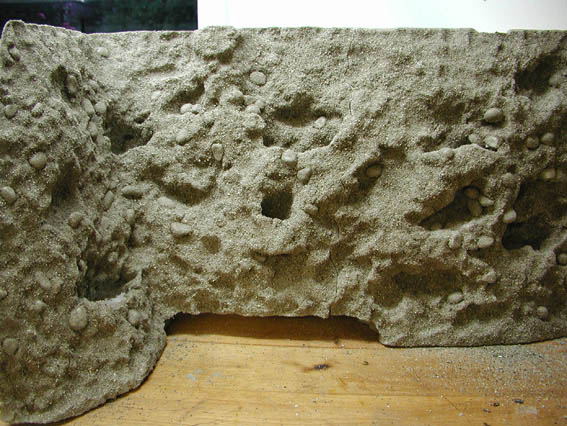
After the sand was shaken and tapped off.
.
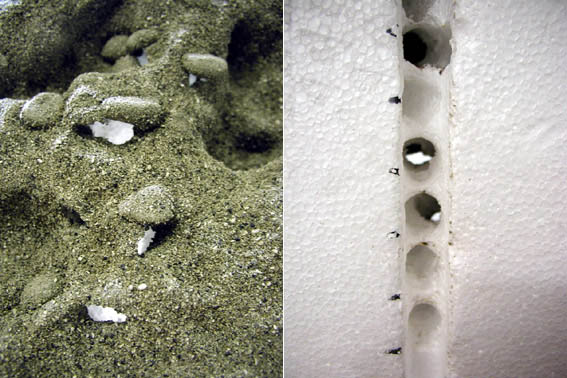
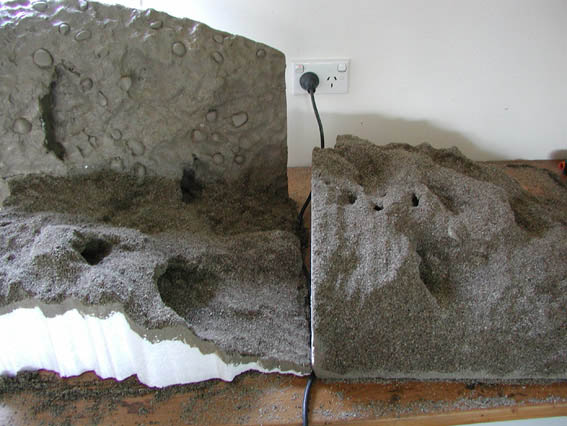
The left side image is looking up from the bottom, of the righthand side of the wall into the small caves where the jets from the inlet spraybar feed into the tank. The right image is from the rear with the chanel where the spraybar will sit.
The finished wall with some extra stones, prior to coating with translucent Pond Paint to seal of any harmful toxins. Incidently burning polystryene fumes are now completely nontoxic, you sure wouldn't think so when you smell it.

Prior to this photo I did have a test run, filling the tank and checking the filter and heater. All seemed fine, though I did become very aware of how the polystyrene tries to float with considerable force. I have now firmly siliconed it in, even siliconing extra rocks in front of the base to make sure it won't try to lift forward.
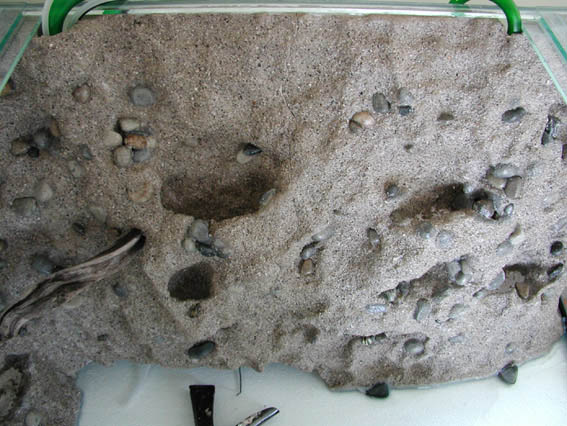
A view looking down into the tank showing the pockets for the plants, and the inlet and outlet pipes. The tranlucent Pond Paint has now been applied, two coats.
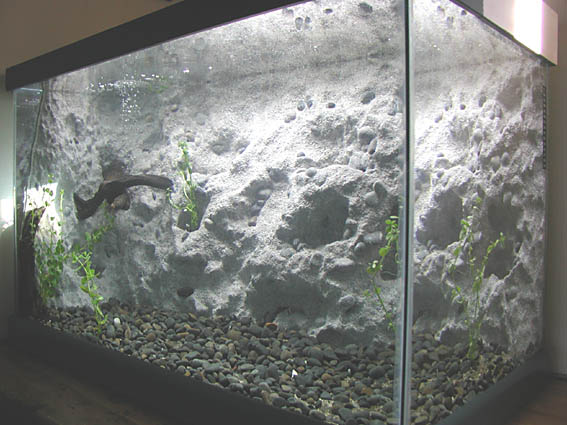
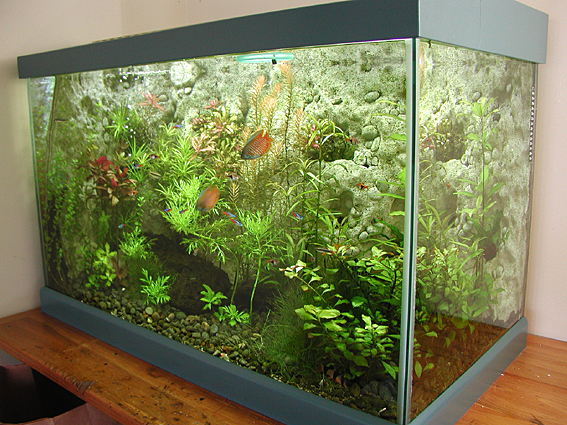
Here the tank has been filled with water and the gravel, and a few plants thrown in to help give me some ideas of the size and type of plants I will need. The translucent Pondpaint has gone white when submersed, (not quite as white as it looks in the picture) something I was hoping would not happen. I have two choices to fix the problem, either paint it again with some darker tint mixed into the Pondpaint, or leave it to age with algae growth and staining.
I have chosen to let it age, as most of it will eventually be hidden by plants. While it doesn't match the gravel anymore, it makes a nice backdrop for the plants, and has quite grown on me. It would certainly be the perfect background for a marine aqarium.
I am pleased with the way no hardware is visible, and I have rigged the light with remote ballasts and two switches for two or four tubes. I have also plumbed the tank so that it can be drained and filled without the garden hose, just a couple of valves to operate under the bench.
Several months have passed to reach this stage, still not quite what I'm after but a lot of fun trying to get there. I intend to remove some of the plants and replace them with others. The Bristle Nose Cats love cleaning that back wall, and in fact had some babies in the inlet caves much to my surprize. I have a Black Knife fish that has comandered the heater cave as his home. If I was to do it all again, I would build a lot more caves into the background. I didn't realise how much the different fish like their caves, even if they are quite tight to enter.